Start Up
The "start up" properties of the quiz can be shown by selecting the item Properties from the item of Quiz menu, and then clicking on sheet named "Start up".
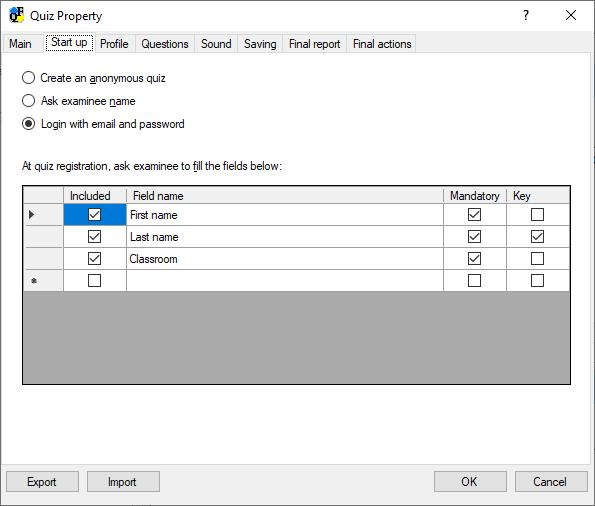
The following dialog window will appear:
Through these options it is possible to identify the student taking a quiz, either by name and surname (or matriculation), or by filling in a form that can be customized as desired by the teacher (by asking to insert, for example, name, surname, class, school and so on).
There are therefore three possibilities:
- Create an anonymous quiz : the student will not be asked anything.
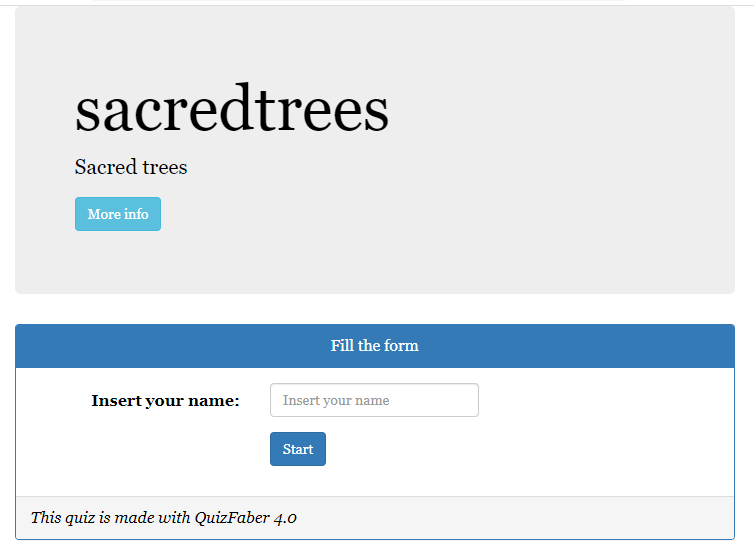
- Ask for the examinee's name at the beginning of the quiz.
- Login with email and password, obtained by filling out a registration form for the first time with the addition of other information, prepared by the teacher.
By selecting the second option ("Ask for the examinee's name") the initial page will be the following:
By selecting the third option, "Login with email and password", you can precede the start of the quiz with the login page, that is the email and password fields, as shown in the following figure :

This option is only available if you have enabled the quiz when saving results in server Node.js (local or remote) .
To choose your email and set your password you must first registered.
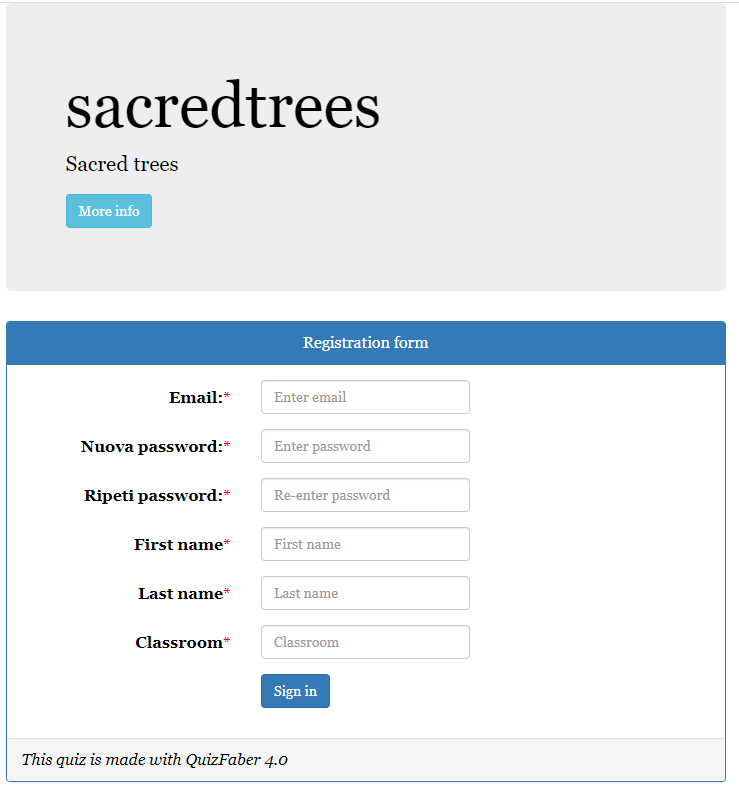
Registration page
The registration page allowing you to choose your email and set your password, and also collecting information of the person who will take one or more quizzes.
This information is customizable (both in number and in content) by whoever creates the quiz. To make the entry field appear on the registration page, the "Include" option must be checked in the desired field. Next to it, you can specify the label that will appear next to the input field (for example "School year" or "Class").
Two further options are available: "Mandatory" which forces the examiner to obligatorily enter a value in the input field. This field cannot be left blank and, until specified, the quiz cannot start.
The "Key" option is used to specify one or more search fields of the quizzes saved on the server, for example, the "surname" field can be an excellent candidate to be used as a search key for a quiz.
Here's an example of a registration page: