Create web app in Heroku
Heroku is a platform as a service (PaaS) on the cloud that supports multiple programming. It was acquired by Salesforce.com in 2010. Heroku began development in June 2007, when it only supported Ruby, later Java, Node.js, Scala, Clojure, Python, PHP, and Go were added.
QuizFaber to permanently save the results of the quiz requires a server, always listening and able to recognize when a quiz in HTML sends the results. This server was written in Node.js , the source codes are distributed for free, but it needs a hosting service to run, just as if you want a website you have to subscribe to a hosting service.
The Heroku cloud was chosen, for ease of use and because it is one of the few free when used at a basic level.
More professional solutions without database space limits often require paid services, on the same cloud as Heroku or other more popular clouds (Microsoft Azure, Google Cloud, Amazon Web Services, to name a few).
To activate the Heroku cloud, the procedure is as follows:
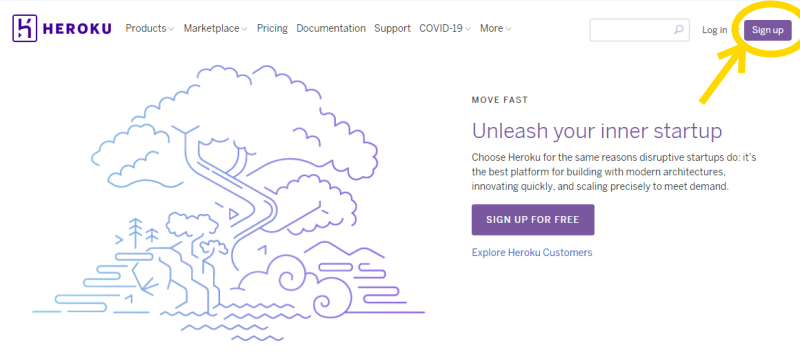
1) With your favorite browser, connect to the site: www.heroku.com and click on the " Sign up "if you are not yet registered, or" Login in "if you are already registered:
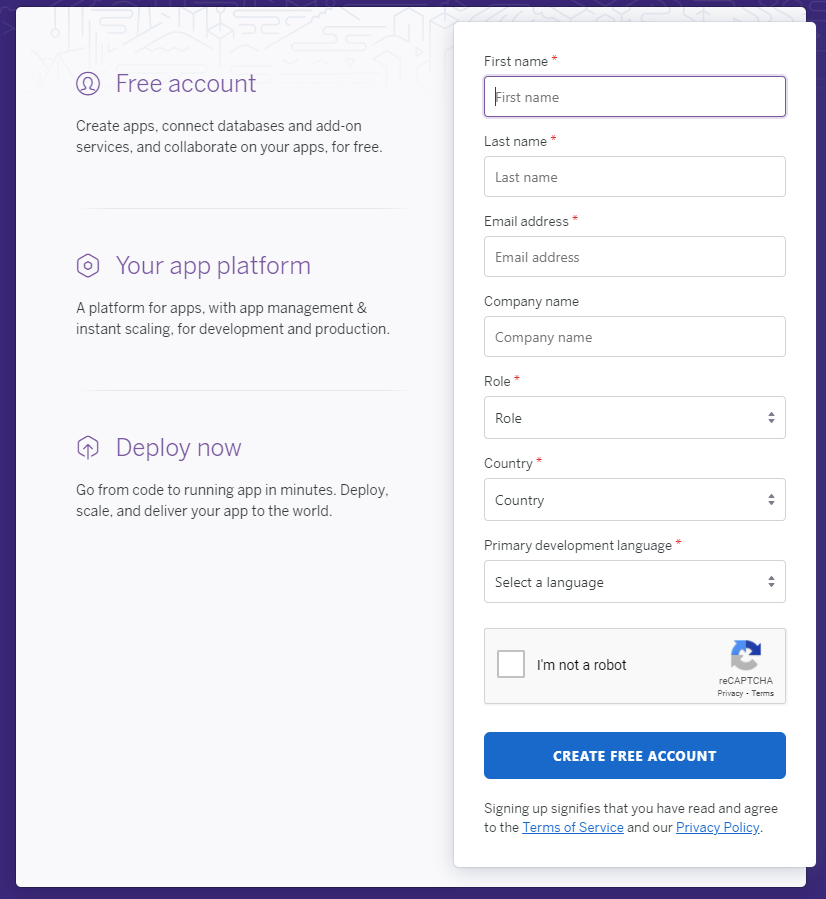
2) In case of registration, enter the required data, in particular as " primary development language " select " Node.js " and at the end press the " Create free account ":
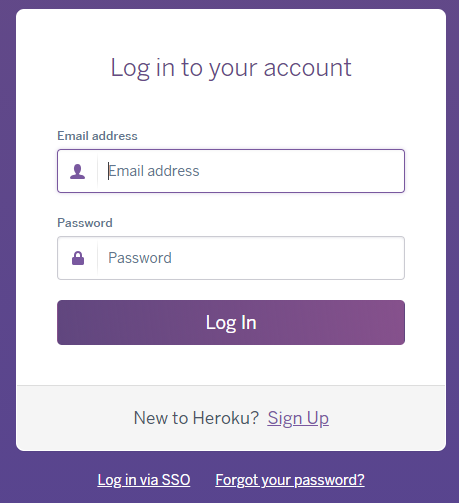
3) If you have already registered, by pressing " Login in " on the main page, you will be asked for your credentials:
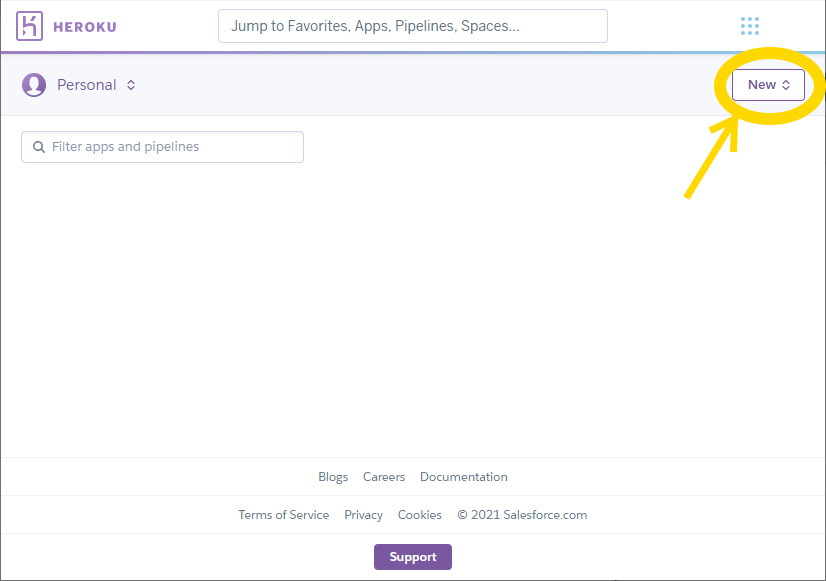
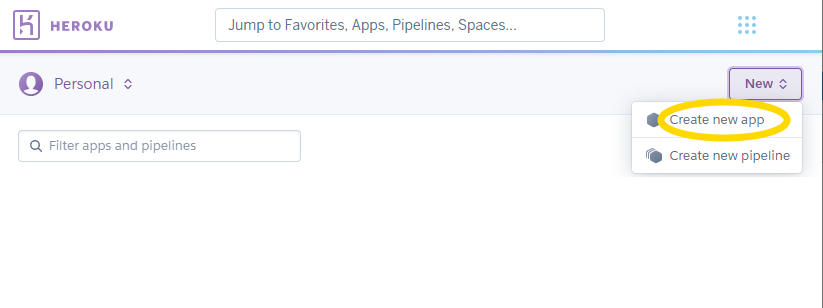
4) Once you have completed the registration phase or logged in, you are on the main page of your account. Press the " New " button, then " Create new app ":
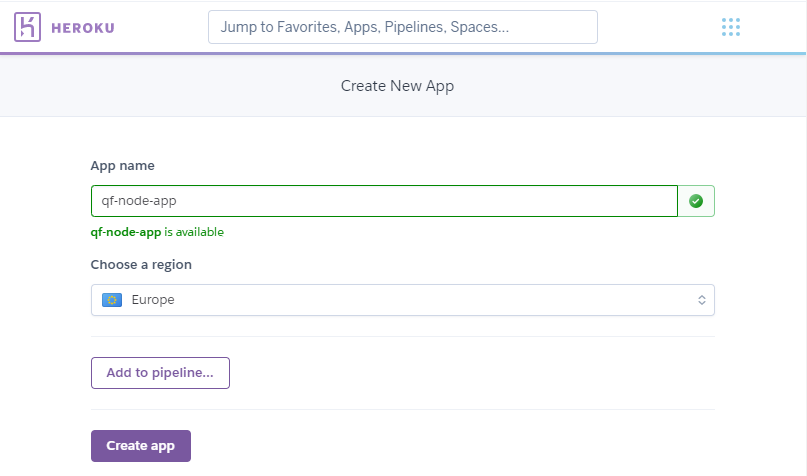
5) Choose an app name and choose "Europe" if you are in Europe. Press the "Create app" button:
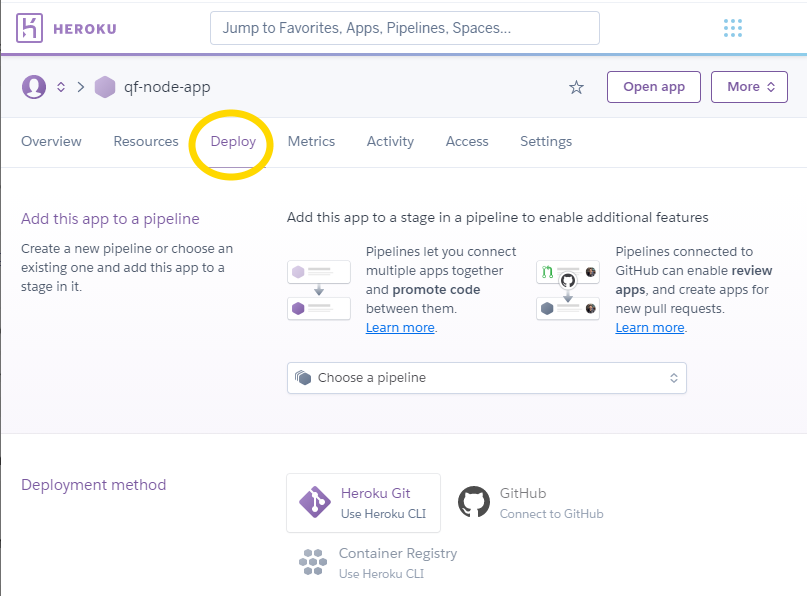
6) Click on tab "Deploy"
7) Choose as " Deployment method ": " GitHub ", of which you already have an account, as it was created in previous step :
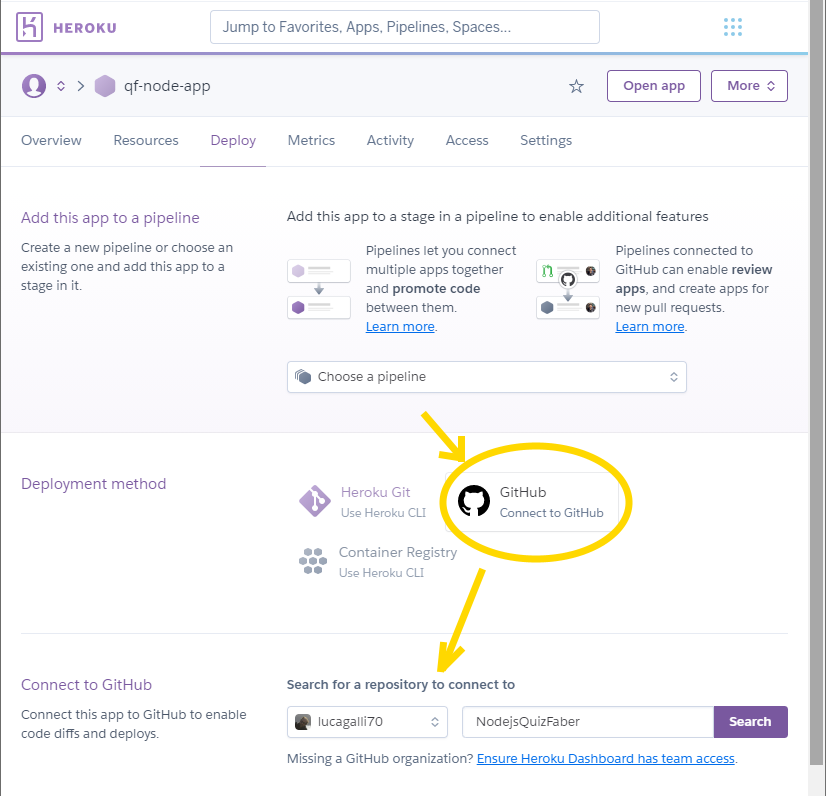
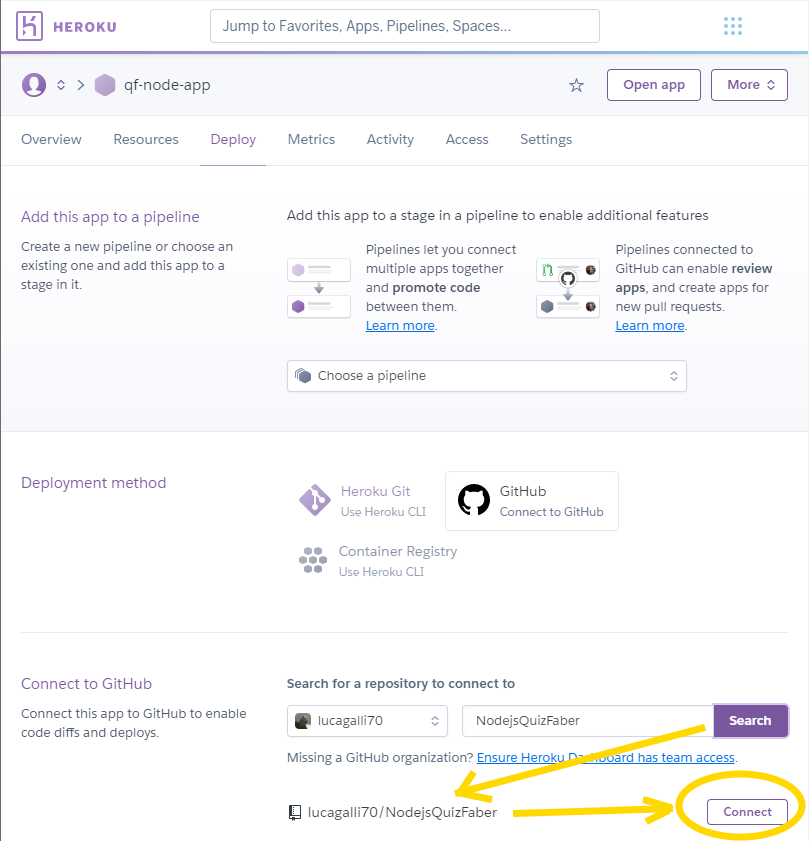
8) Search the name of your repository with the " Search " button and once recognized, press the " Connect " button
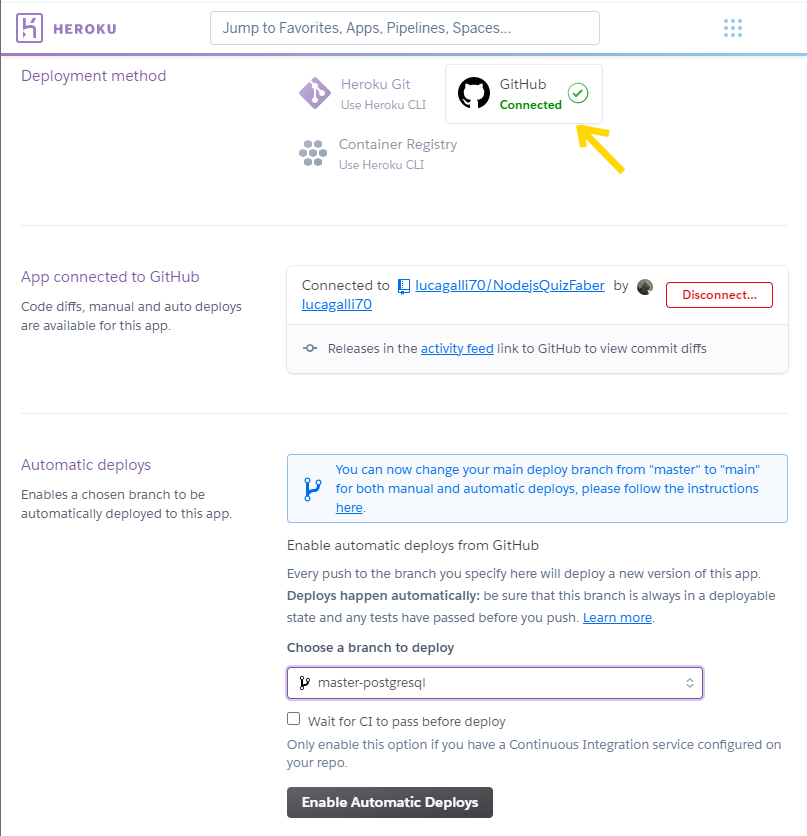
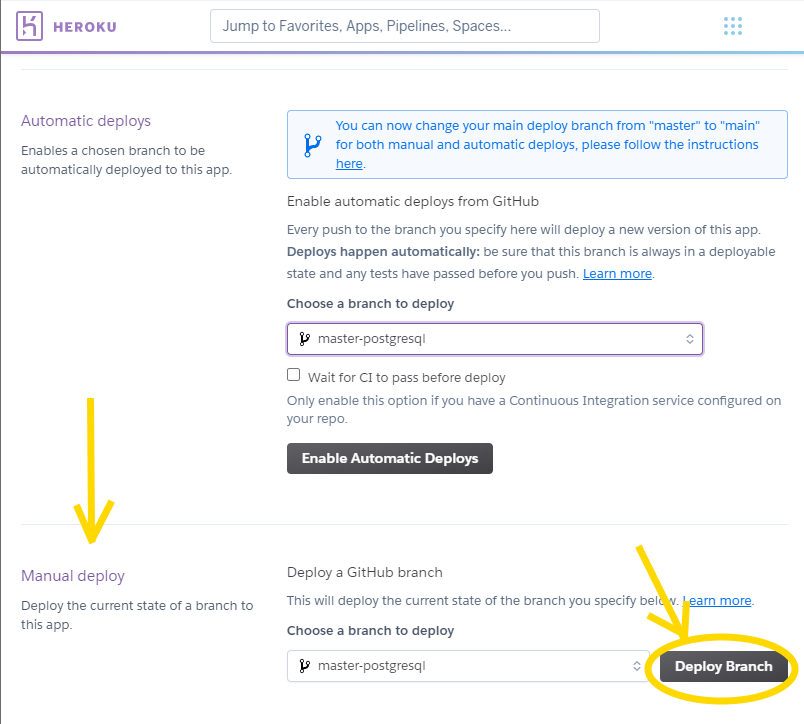
9) Once you have verified that you are connected to your GitHub, scroll down the page until you find the " Manual Deploy " at the bottom, your default branch will be "master", then press the " Deploy branch "
10) The deployment process will start, at the end, if successful, it will display:
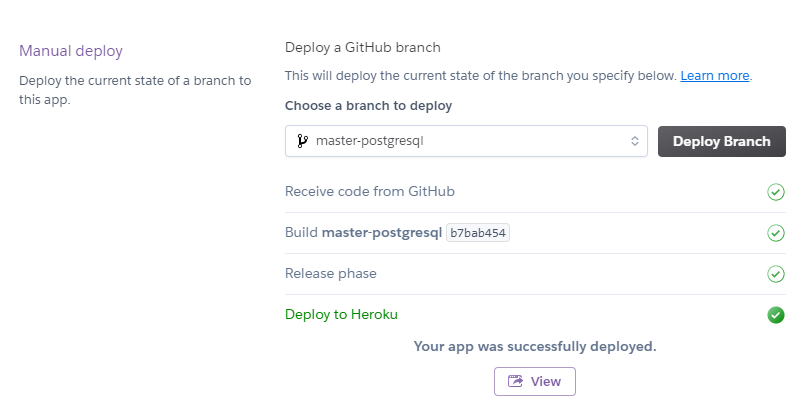
At this point the " View " button is active, your web app would be ready but not yet functional because the next step will be to create the database connected to the app, as will be explained in the next post .
As we have seen, for the creation of a web app we do not have the possibility to directly insert the source codes but we were asked to indicate the repository where the source codes were previously loaded (and the repository par excellence is GitHub). This is a feature common to all cloud environments.
This allows programmers, if we had chosen the automatic rather than manual deployment mode, to have the ability to see the code changes immediately effective (as they say, "live"), as soon as a new version is declared completed .
Related topics
- Deploy QuizFaber Node.js server to the cloud
- Create repository in GitHub
- Create web app in Heroku
- Create database in Heroku
- Manage database in Heroku with PostgreSQL
- Advanced management of database and app in Heroku
- QuizFaber configuration of remote server
- Read the quiz results from the remote server