QuizFaber configuration for local server
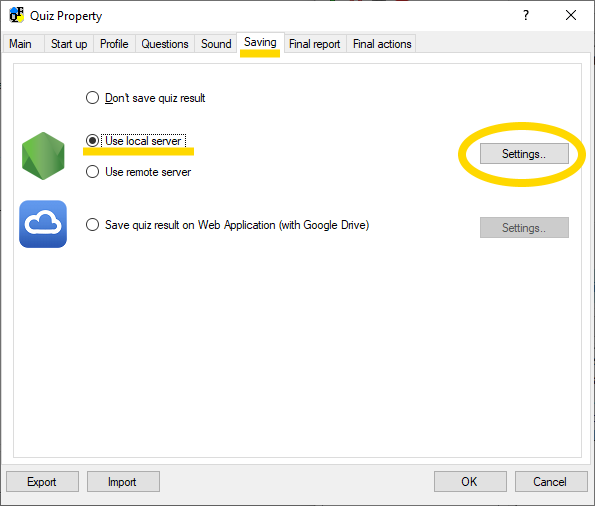
The configuration of QuizFaber is done in the " Quiz Properties ", which can be selected from the Quiz menu item, and then click on the label "Saving", then " Use local server " and pressing the "Settings" button.
The following wizard appears, divided into the following steps:
- Decide whether to create a new configuration or modify the existing .
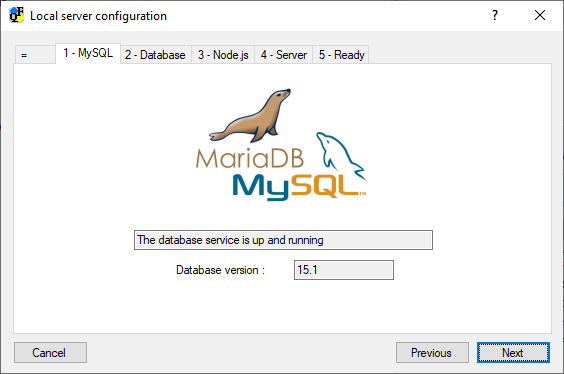
- Check if the MariaDB or MySQL database has been installed and is functional.
If not present, the link to the MariaDB site is shown ( https://mariadb.org/ ). -
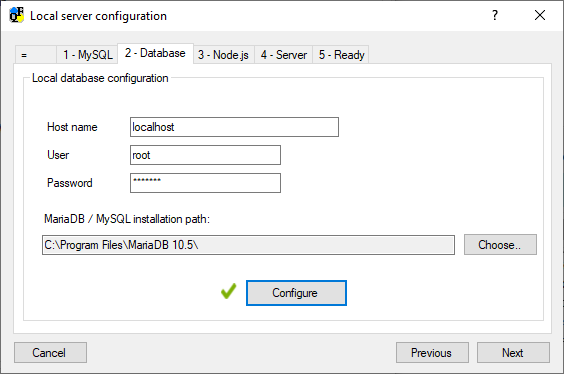
Setting database parameters . It is advisable to leave the default parameters and to add only the password to the database, the one you were asked for during the MariaDB installation. Before proceeding, press the " Configure " button.
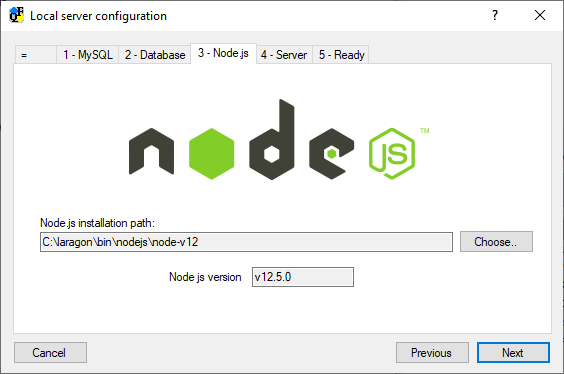
If the parameters are all correct, if the database does not exist, the instance named "quizfaber" will be created with all the tables. On the other hand, if the "quizfaber" database already exists, it will be checked that it has the same version (written in the "settings" table) and, if the version is lower, the update script will be launched instead of creation. - Check if Node.js is installed and is functional.
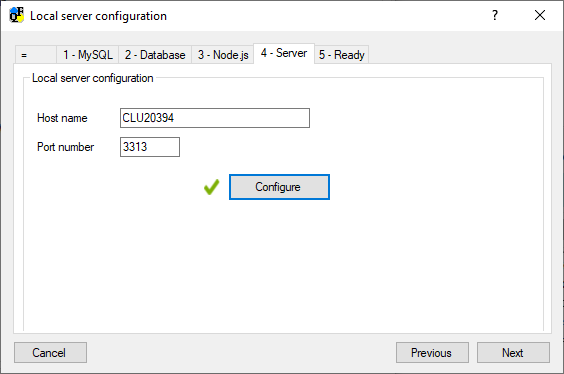
The version number of Node.js is shown (for information only, in the figure it is version 12.18.3), while if it is not present, the link to the Node.js site is displayed ( https://nodejs.org/ ) in case you choose to download and then install it to enable the server functionality local. - Setting local server parameters , it is recommended to leave the default ones. Before proceeding, press the " Configure " button.
Below are the screenshots of the steps listed above. Due to the wizard nature, each screen should be self-explanatory.


Related topics
- Local server installation (Windows)
- Local server installation (Linux)
- QuizFaber configuration for local server
- Local server management from QuizFaber
- Read the quiz results from the local server